Case Study Assets Creation
Our Case Studies highlight the various apps we’ve developed at the agency. These projects are featured on our website to showcase our work, process, and results.
To explore the LCA Case Studies, please visit the CS section.
Each designer is responsible for creating the Case Study (CS) assets for their own projects when time allows. Every project must have a Case Study — even if it's under an NDA. This ensures a smooth workflow and keeps CS ready for publishing at all times.
To create the CS, the designer needs access to the app. It's essential for the designer to reconnect with the developer once the app is nearly complete to ensure everything needed for the case study is available and accurate.
Assets Overview
The following assets are created for each app and are used across the Case Studies section, as well as in various areas of the website and on social media platforms:
-
Cover Image: The main visual used for the case study cover.
-
Testimonial: A client testimonial that helps build credibility and trust with potential customers.
-
Case Study Content: A detailed section featuring images, text, and videos that tell the story of the project.
-
Video Recordings: 3D mock-up video walkthroughs used in the case study and on social platforms.
Designers are allowed to make small, practical adjustments to improve the design when necessary. For example, if the client’s chosen color palette does not meet accessibility standards or negatively affects visual clarity, you may modify it.
However, it's important to stay within the limits of what’s realistically achievable in the respective tech stack. Avoid over-designing or introducing elements that cannot be implemented in platforms like Glide, Bubble, FlutterFlow, or Webflow. The goal is to enhance quality while keeping the design realistic and implementable.
Figma Use
Within this Figma, you can create and edit the following assets:
-
Cover Image
-
Testimonial
-
Case Study Images
🔳 Cover Image:
Each Case Study (CS) includes a corresponding cover image. These are pre-designed with a consistent structure — the only variation lies in the image content.
-
Choose a cover layout you like and copy-paste it into your CS.
-
Maintain the existing structure (three image composition)
-
Use the selected layout without creating a new composition. Simply replace the image content with your app design.
Types of Cover Images
There are four image types used in the cover image: (not all at the same time, see what your composition has)
-
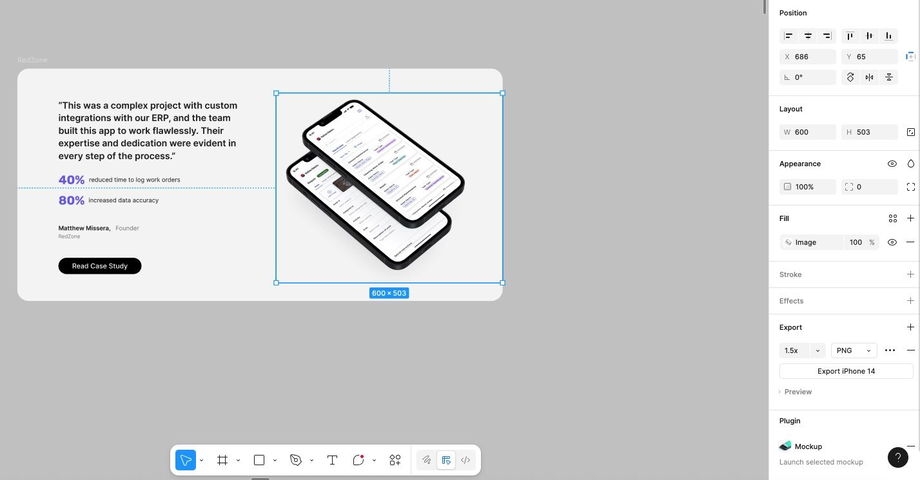
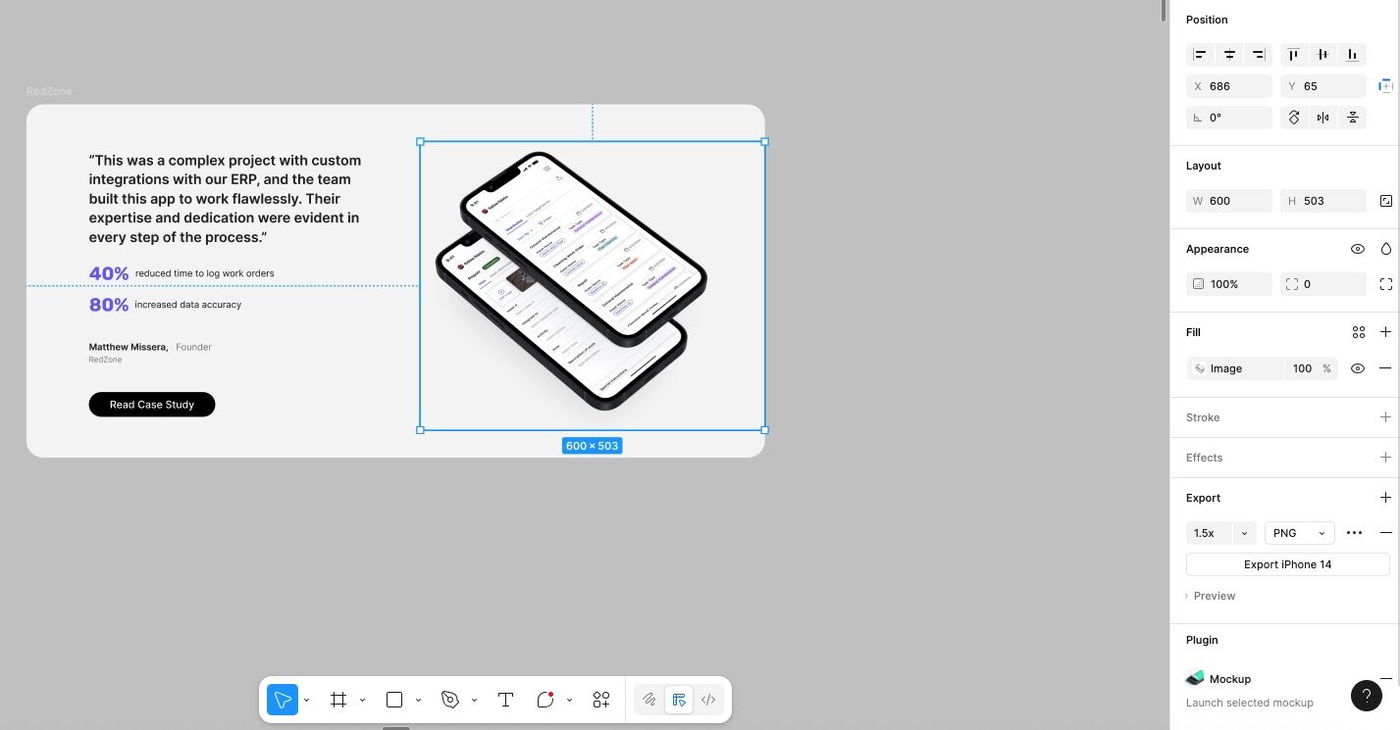
Mockup Plugin Images
→To update:-
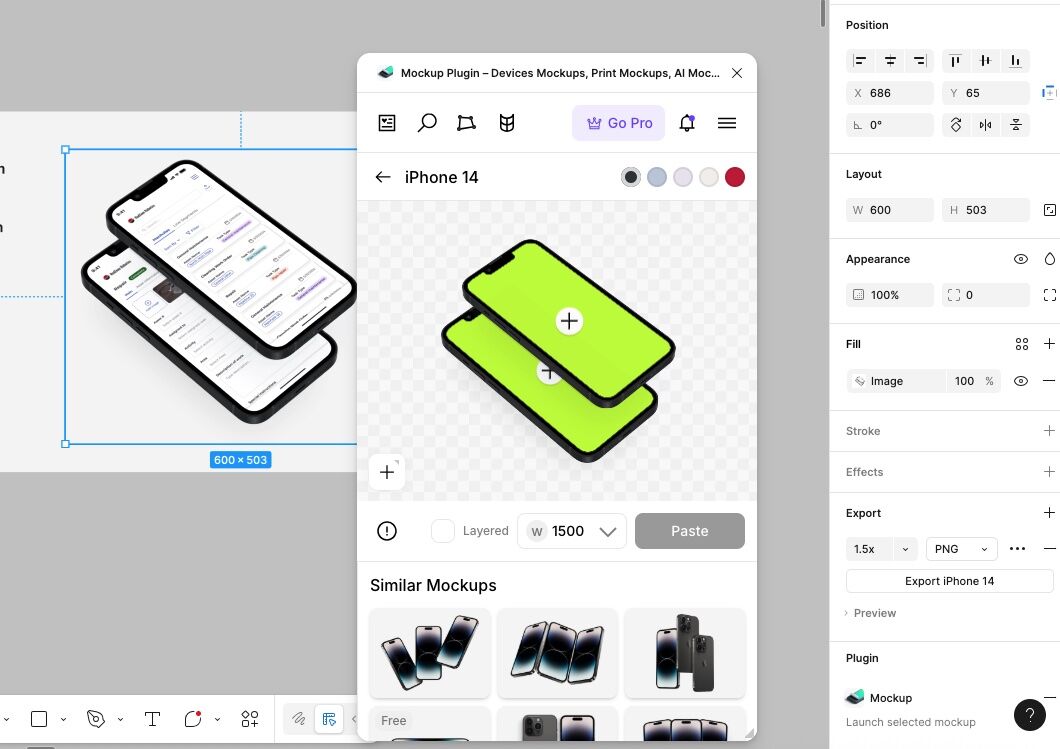
Click on the image, then go to the right-hand bar and open the “Mockup” plugin under Plugins.
-
In the plugin panel, click the “+” button to select the frame (your app screen) you want to insert into the mockup.
-
Repeat this for all devices shown in the mockup.
-
In the plugin settings, set the device color to BLACK.
-
Once done, click “Done” to generate the new mockup image.
-
Replace the current image with your updated version.

-
-
Frontal Desktop Images (non-plugin)
→ To update:-
Delete the existing design inside the frame.
-
Paste your desired frame.
-
Press K to activate the scale tool and resize as needed for responsive proportions.
-
-
Context Image
→ To update:-
Download an image that you think can be a good fit to give context about it
-
Replace the existing image.
-
-
Standalone Frames Without Devices
→ To update:-
Resize using K.
-
In the Appearance panel, set Corner Radius to 10px.
-
💬 Testimonial
Each Case Study (CS) includes a corresponding testimonial. These are pre-designed with a consistent structure — the only variation lies in the image layout.
-
Choose a testimonial layout you like and copy-paste it into your CS.
-
Maintain the existing structure (heading, quote, client info). You don’t need to use real content — placeholder text (e.g., Lorem Ipsum) is fine.
-
For the testimonial image, use the selected layout without creating a new composition. Simply replace the image content with your app design.
Types of Testimonial Images
There are three image types used in testimonials:
-
Mockup Plugin Images
→ Follow the steps above (under Cover Image content) to update with your app screens. -
Frontal Desktop Images (non-plugin)
→ To update:-
Delete the existing design inside the frame.
-
Paste your desired frame.
-
Press K to activate the scale tool and resize as needed for responsive proportions.
-
-
Standalone Frames Without Devices
→ To update:-
Resize using K.
-
In the Appearance panel, set Corner Radius to 10px.
-
📸 Case Study Images
Each Case Study (CS) includes a series of images.
-
Choose a CS layout you like and copy-paste it into your CS section.
-
Maintain the existing structure. You don’t need to use real content — placeholder text (e.g., Lorem Ipsum) is fine.
-
For the images, use the selected layout without creating a new composition. Simply replace the image content with your app design.
🎥 Video Recordings
Video assets are also required for both Case Studies and social media content. Please read the following articles to understand how to properly prepare screen recording assets and create final deliverable videos.
Recording App Screen Videos for mock-ups
How to Create Effective Videos for Social Media
This helps Dani, who manages the website, easily locate and implement the videos in the correct sections.